So I’ve been cycling for 3 months, lost loads of weight and life is better!
However, it’s not always easy or practical to leave the house for hours when you have kids. So how can you cycle on your bike at home?
Zwift!
What is Zwift?…. Well to put as simple as possible, Zwift is a phone app or computer programme available to link up to your bike where you can cycle in a virtual world and not have to worry about leaving the house or the weather.
This might seem complicated to some or simple to others so I’m going to explain in stages how to set yourself up in Zwift.

Stage 1 – The turbo trainer
This was a bit of a minefield, indoor trainers for bikes range between £50 to £1000.
The lower end ones are not smart, when linked to an app or computer programme they cannot read the lay of the virtual land and adjust resistance accordingly. However one of the cheaper trainers accompanied with a speed and cadence sensor is a great start 👍
You also have to look at the size and type of wheel you will be using. A 29 inch MTB wheel probably won’t fit unless you replace tire with a trainer tire.
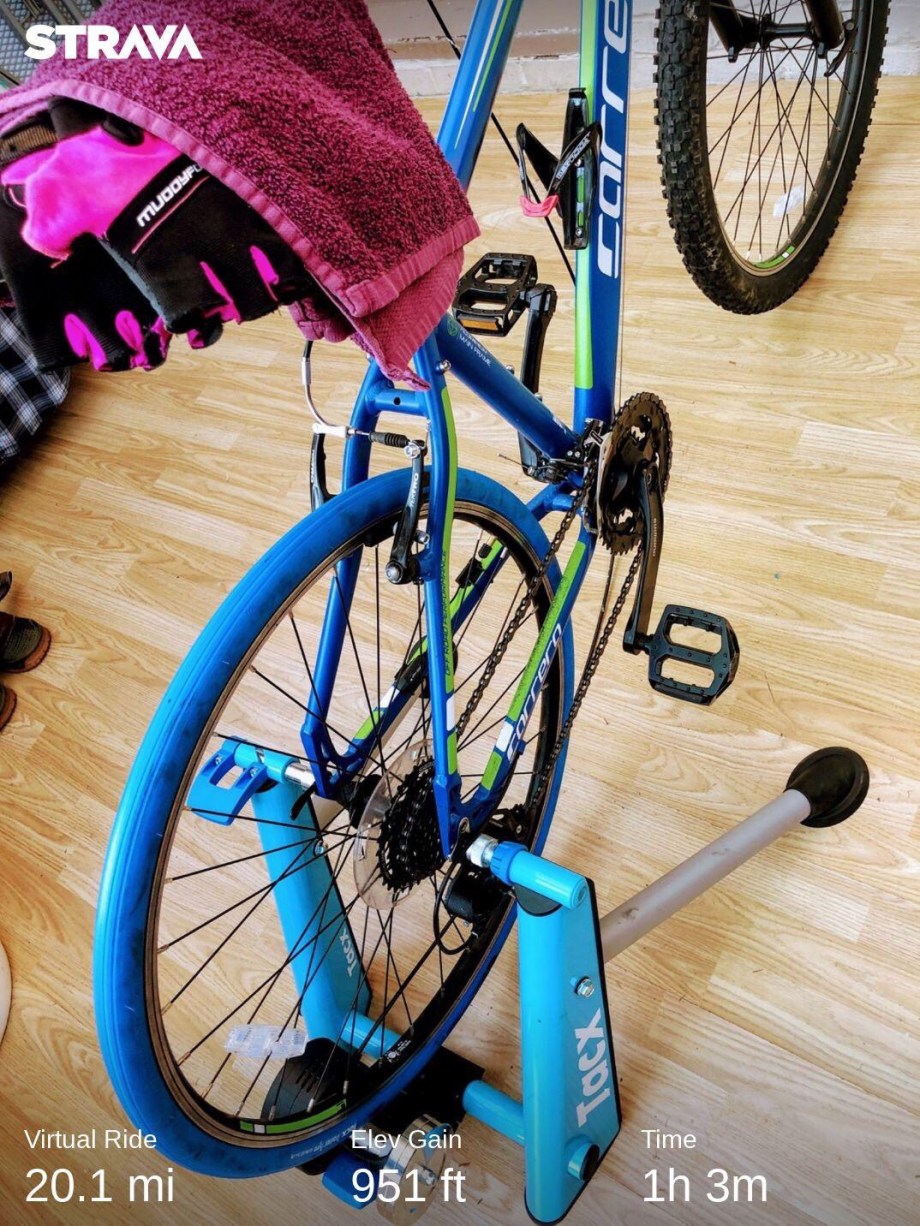
Also the tyre you are using. Tires with tread (e.g mountain bike tires) are no good.
Stage 2 – The bike, tire and sensors
In my case I used a mountain bike I bought for my son last Christmas that he’s hardly ridden. However a mountain bike tire isn’t suitable, a training tire is absolutely necessary. It cuts down the noise drastically and allows much higher speeds.
Also bear in mind if you have 29 inch wheels you may not be able to use all types of Turbo Trainer.
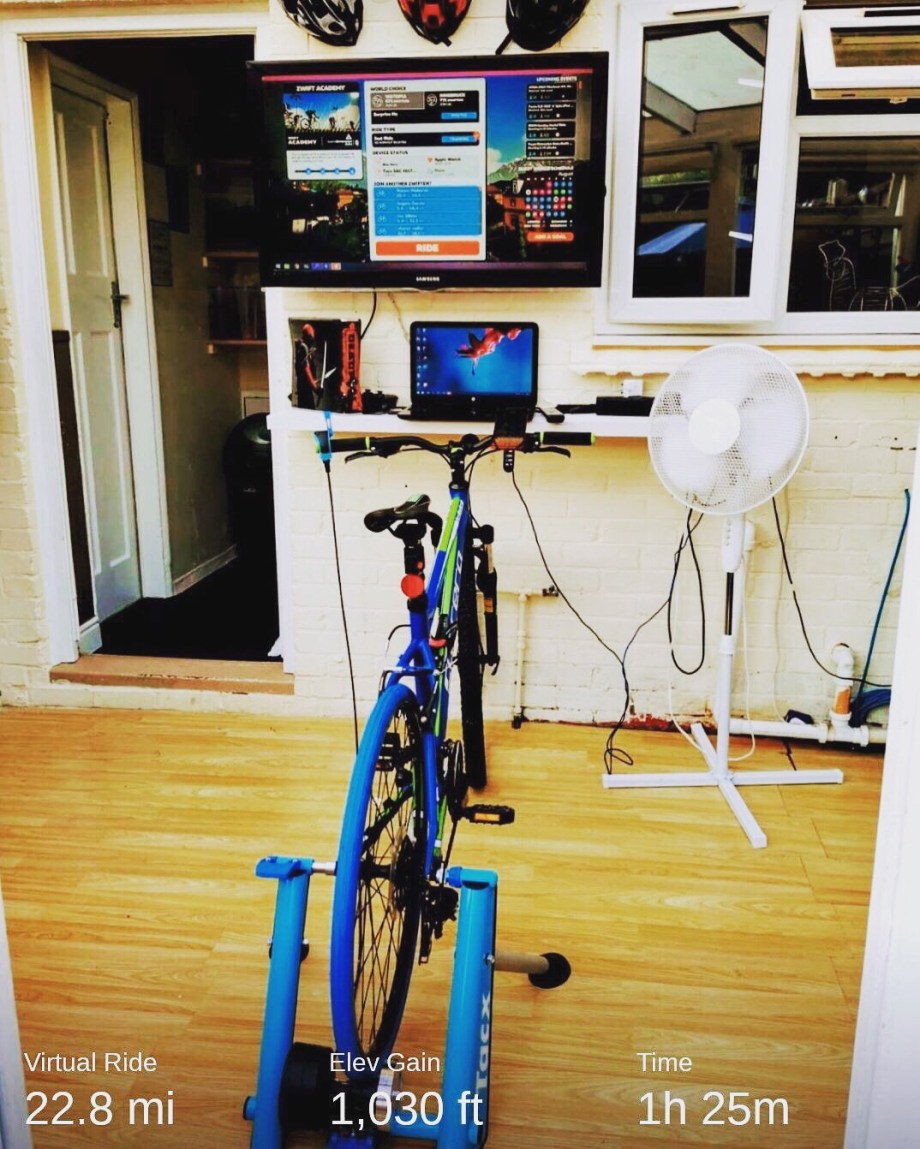
The TacX trainer featured in the picture above came with a speed and cadence sensor, once fitted to the bike it communicates with Zwift to let it know the Speed to move your virtual cyclist.
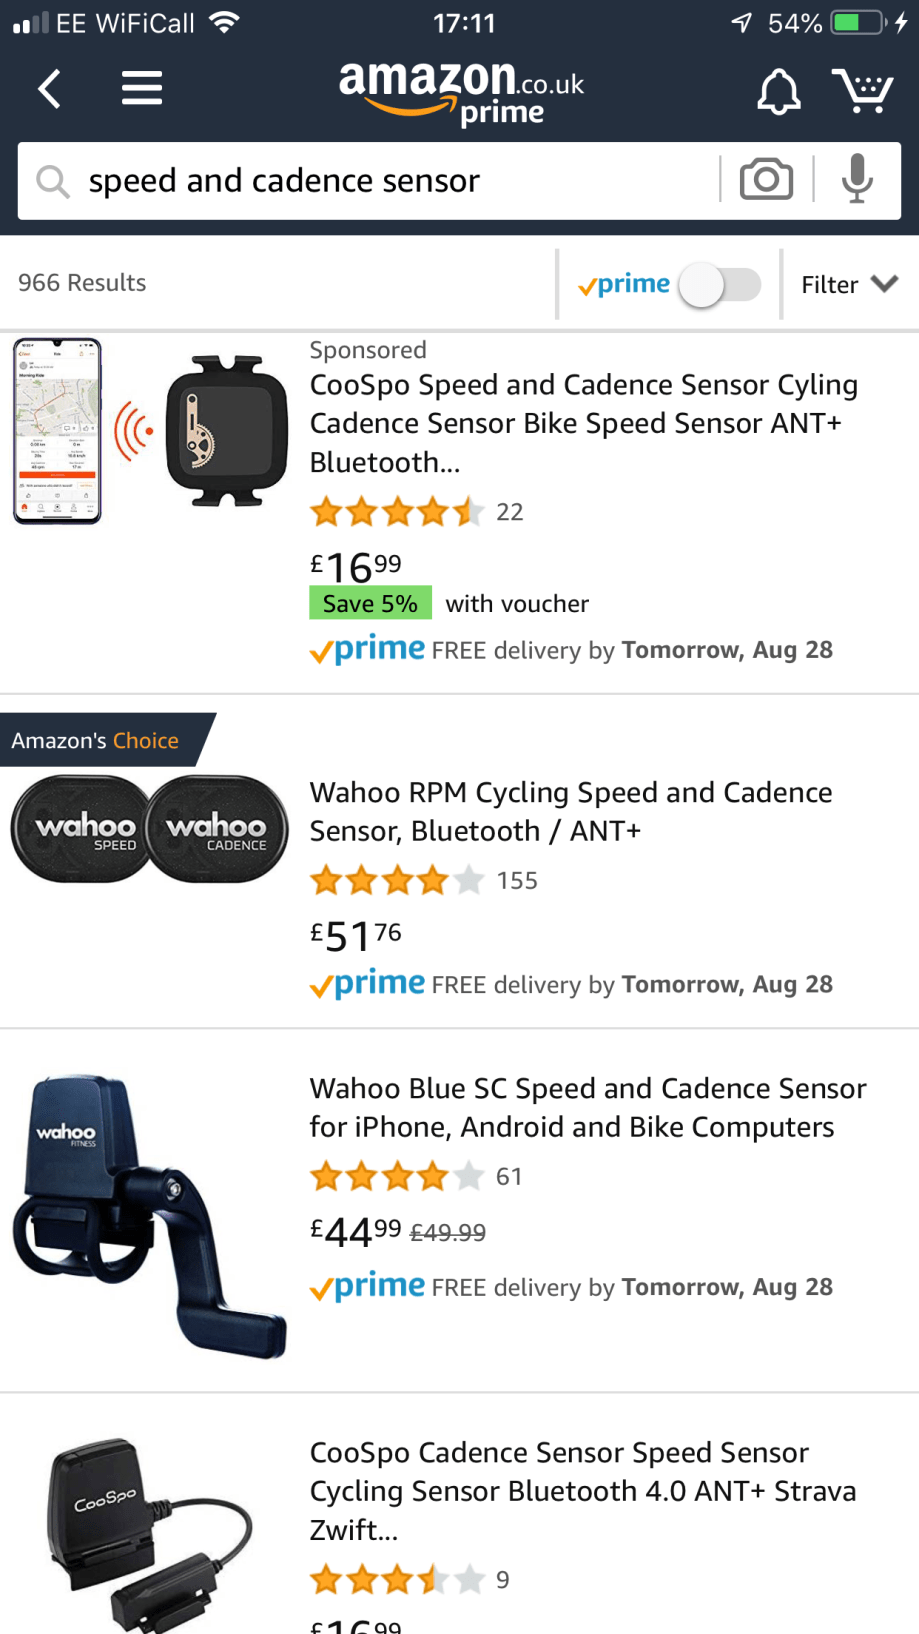
If your trainer doesn’t come with a speed and cadence sensor you don’t have to spend a fortune…
Stage 3 – Phone, Tablet or Laptop?
So you’ve got your bike set up on a trainer with a speed and cadence sensor. The next thing is to decide what you will view Zwift on.
Mobile – This is where most people start, you can clip to your handle bars, sensors connect to phone via Bluetooth and away you go.
Tablet – Similar to mobile however you’ve got a bigger screen.
Laptop – This is where it starts to get good! You can download Zwift for Windows or Mac for free. If your laptop has Bluetooth it can pick up the sensors on the bike. Alternatively if your laptop doesn’t have Bluetooth you can download the Zwift companion app on your phone, the sensors connect to the companion app, and then to the laptop. I found this way not to be great. If your laptop doesn’t have Bluetooth it’s better to buy an Ant+ dongle for about £13 on Amazon. This way your bike sensors will connect directly to laptop with no interference.
TV – follow all instructions for laptop, but connect an HDMI from laptop to TV 📺

Stage 4 – Essentials
Don’t forget…. Fluids, a Towel, and a fan. All 3 of these are essential 👍

So this is how I got set up on Zwift for under £200. I was quite lucky because I had a spare TV, spare laptop and bike laying about. You don’t have to go this far however, you can use Zwift just with your phone, and also your everyday bike. It’s completely your choice.
If you have any questions at all just comment below and I’ll try to help 👍
One last thing…. On October 6th 2019 I will be cycling from Buckingham Palace to Windsor Castle to raise money for charity (The Princes Trust). If you can spare any money to sponsor me and help change young people lives, please click on the picture to sponsor me through Just Giving 👍 Thank you 💙